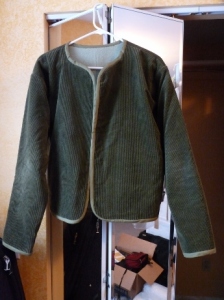
Green Corduroy Fleece Lined Jacket

Green corduroy jacket with fleece lining.

Green corduroy jacket with fleece lining.

I had this green corduroy kicking around for years and years. I remember using it when my boys were little to make sleeping bags for their GI Joe’s! haha. It’s so very soft and I love the color, I thought it would make a nice little jacket.

Green Corduroy Jacket (2) (460x345)

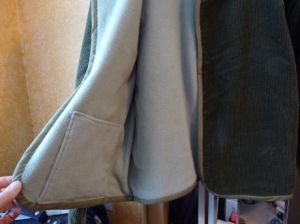
Lined with soft baby polar fleece

I found some light weight, pale green, baby polar fleece that I had from back when I did some professional sewing for a lady designing her own baby clothes line. I thought if I just line the whole inside I can bind the edges with bias tape, an easy, clean way to finish edges.

Green Corduroy Jacket (1) (460x345)

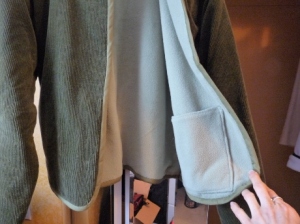
I hand-stitched patch pockets inside.

I wasn’t sure if I would add patch pockets, then decided that would look not as ‘clean’ or ‘chic’. But I do love a place to tuck some tissues or maybe drop your keys when your hands are full, so I hand-stitched some to the inside. I made the pockets out of a sturdy thick flannel and the polar fleece.

Green Corduroy Jacket (8) (345x460)

With fancy scarf my fiance sent me from England.

I still haven’t decided how to finish the front, you know, buttons? Decorative stuff? I left it plain because I thought it’d be fun to play with. I’ve had NO TIME to play, but I found that the pretty scarf my sweetie sent me from England matches it to a T…I just trimmed off some of the frilly rufflely silk on one side (just a little too much frill for me) and it looks great! I’ve gotten many compliments on the look, but I still want to do ‘something’ with the front.

Green Corduroy Jacket (5) (460x345)

Close-up of the scarf.

Here’s a close up of the scarf…isn’t it pretty?

Green Corduroy Jacket (9) (345x460)

Pattern I used was supposed to be for quilters.

The pattern I used was a basic no collar design for quilters to use patches of fabric. It’s by “Merchant Rag” and called Fran’s Jacket. I bought it a gazillion years ago when I worked at So Fro Fabrics.

 I’ll try to get a picture of me wearing it to show you….one of these days!

If you want to see more of my Jackets, keep an eye on “THIS PAGE”, I’ll be updating it as I go.

Mary’s Green Hummus

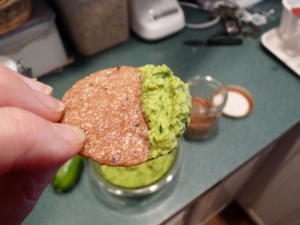
I know it’s Saint Patrick’s Day today, but really that’s not why I made this Green Hummus, I just love to have it around for the week for easy, healthy snacking or for lunch. It tastes so wonderful and zesty! The great part is all the green veggies you’re getting in there along with the beans, garlic and lemon juice; all fantastic for you!

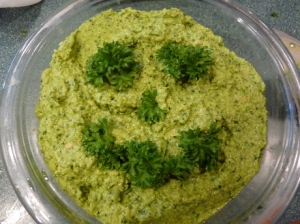
I couldn't resist!

I couldn’t resist!

I went to put parsley on at the end, to make it look fancy and all…and ended up with a smiley face! haha..why not? Seamus McHummus?

Green Hummus (2) (450x338)

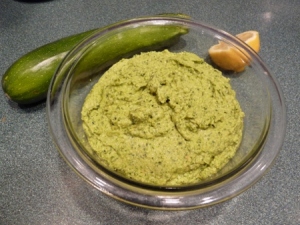
Close up of Green Hummus

It’s loaded with fresh spinach, kale, parsley and zucchini (courgette). If I had my garden growing with fresh basil, like I used to, I’d try throwing a bunch of that in and see what it tastes like! (I love fresh basil!)

Green Hummus (4) (450x338)

What a great snack, full of vitamins and antioxidants!

Mary’s Green Hummus (more pictures below showing steps in progress)
1 ½ c (or so) diced Zucchini (Courgette) with peel on, about 1 med sized.
2-3 cloves garlic (try 2 first and taste test!)
Juice from 1 ½ lemons add pulp too (use 1 lemon then taste before you add more)
¼ tsp salt
1 ½ tsp cumin powder
1 c Fresh parsley – just pinch the whole tops off stems, pack in 1c measure.
Big handful of fresh Spinach (2-3 c packed)
Fresh Kale – about 2 c torn up and packed in measuring cup, no stems. (1.6 oz)
1/3 c tahini (ground sesame seeds)
1 can garbanzo beans (chick peas) 15 – 19 oz can, rinse the beans well first.

Use a food processor.

1.    Chop up zucchini and put in food processor.  Chop the garlic in big pieces and toss in along with lemon juice, salt and tahini. Give it a couple of whizzes to get it mixing.
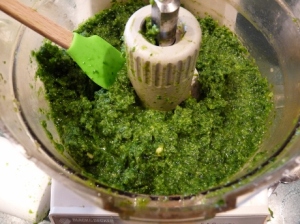
2.    Add Spinach and mix a bit, then Kale and parsley the same. Let it mix quite well now, keep stopping and scraping it down. It tastes pretty good at this stage and you can leave it as a dip without the beans.
3.    Now add beans and mix really well. Keep stopping and scraping the bowl. Taste now and decide if you want more garlic or lemon juice.

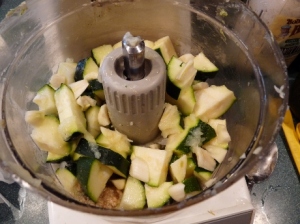
Zucchini (Courgette) and lemon juice etc. waiting for whizzing.

Zucchini (Courgette) and lemon juice etc. waiting for whizzing.

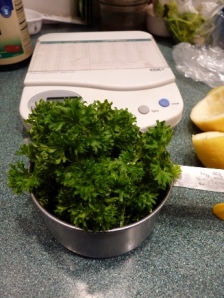
What 1 cup of 'packed' parsley looks like when I let go and it 'sproings' up!

What 1 cup of ‘packed’ parsley looks like when I let go and it ‘sproings’ up!

I just quickly pinch the whole tops off the stems of parsley, toss the whole thing in, the small stems near the tops won’t hurt you.

All the veggies mixed up in food processor.

All the veggies mixed up in food processor.

It can vary on how wet it is at this point, last time I made it it was perfect just as is for a dip; this time it was wetter.

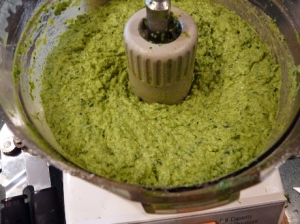
Everything all whizzed in food processor, it's soooo easy!

Everything all whizzed in food processor, it’s soooo easy!

This is how it looks when you add the rinsed garbanzo beans, creamy and it makes the taste a bit milder.

  • In traditional hummus you would add some olive oil, so feel free to add some if you want but I don’t in this recipe.
  • Don’t stress about amounts, just chop it up and throw it in…taste a lot to see if it’s strong enough for you. Don’t go too heavy on the Kale it might get bitter, try 1 c first.
  • I like it heavy on the garlic and I know it’s healthy for you, I just wouldn’t eat it right before going out shopping!
  • oh yeah, it’s sort of like eating pesto…if you don’t have a friend to do a “green teeth check” then make sure you look in the mirror if planning on leaving the house! haha 😉
  • ps. I used photos of two different times I made the hummus, so you can see one is a bit greener than the other, that’s ok! Every time it’s a work of art.
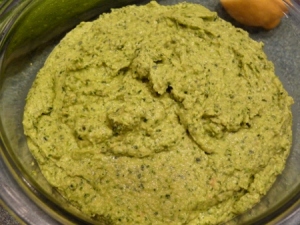
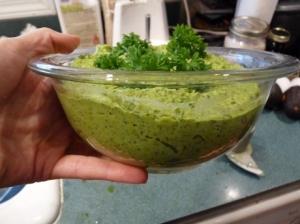
Side view of bowl of finished Hummus.

Side view of bowl of finished Hummus.

This is the smallest bowl from my Pyrex three bowl set, just so you see how much it makes.

Green Hummus (1) (450x338)

Enjoy!

I hope you try it, please leave comments if you do any similar recipes, it’s great to get new ideas!

Golden Oatmeal Honey Cookies – Gluten Free

Golden Oatmeal Honey Cookies

A pile of cookies waiting for tea time!

A pile of cookies waiting for tea time!

These cookies use no processed sugars just honey and no wheat flour, just oats! If you are cutting down on gluten these are perfect, if gluten is a serious issue for you, only use oats that are labeled “Gluten Free”. I don’t have any health issue with gluten, just trying to cut down on it, so I use regular oatmeal.

OOhhh look at all those chocolate chips!

OOhhh look at all those chocolate chips!

Golden Oatmeal Honey Cookies

Preheat oven to 325 F

Ingredients:

¼ c butter (1/2 stick)

¼ c coconut oil

½ c honey

1 c old fashioned rolled oats

½ c quick oats


1c oat flour (I grind oatmeal in coffee grinder that I use just for seeds and grains)

½ tsp baking soda

½ tsp sea salt

¼ tsp nutmeg

¼ tsp cinnamon


1 c chopped walnuts + pecans (heavier on the walnuts)

½ c chopped almonds

1 ¼ c raisins, dried cranberries, apricots, dry cherries etc.

1 egg

¾ c chocolate chips (if you want)

½ c unsw. Shredded coconut (if you want)

  1. Put first 5 ingredients in a pan and heat on low to melt. Stir often to wet the oats and heat.
  2. Start mixing dry ingredients in a big bowl while the oats and honey heat.
  3. Remove oats from heat, put in glass bowl then in fridge or freezer to cool down just so it’s only warm.
  4. Mix nuts and fruits into dry ingredients. (and chips and coconut if adding)
  5. Mix egg into cooled honey oat mixture then mix into dry ingredients to form sticky dough.
  6. Drop onto lightly greased pans, push down a bit. It is very sticky, try to use spoon to scoop and then just touch with fingers to push into mounds. I do a bunch while waiting for first batch and put them on cutting board, they dry a bit and you can pick them up to put on cookie sheet, press down a bit after.
  7. Bake at 325 F 10 min. then turn pan bake 4 min. more. Let cool a tiny bit on pan then remove.

These taste so buttery and crispy, I’m really happy with them! I put too many chocolate chips in the ones pictured (is that possible?) because they kept wanting to fall apart before they were baked! So keep the chips to 3/4 c if you use them at all. I added the coconut oil to cut down on butter amount, I imagine you could use all coconut oil, but won’t have the same buttery taste. Add whatever dried fruits you want.

  • I also think these may be good baked as bars, I’ll try that next time, it’d be a lot less messy! (The dough is sticky!)
  • I think if you sprinkled little blobs of this dough all over the cookie sheet, and bake for less time, it’d make a wonderful snack to munch on!


“The Lightning Bugs”

“The Lightning Bugs”

I peer out my bedroom window
into the darkness
listening to the crickets
and frogs songs caress.

A peaceful end
to a long hot day,
a slight cool dark breeze
brings smells of summer night my way.

My fields and trees
are absolutely alive,
an incessant glittering sea
of the lightning bugs arise.

There is a twinkling of light
so clear
on this warm foggy night
Through and in and on
and around all the trees,
lime yellow lights are upon.

Then it continues
in a glimmering show
of electricity
across the grass of the yard
and out into the dark field it goes.

I long to be flying with them,
these little fairies of the night.
When we meet on stem,
it is them I shall know
as Flicker, Glimmer and Glow.

I’ve seen them before
when I was a child
caught them in my hand,
watched them glow
between my fingers
then let them go.

I shall meet them again
on dewy long nights
wandering quietly through the dark
sparkle of their lights.

(c) Mary McAndrew July 8, 2012

I wrote four stanzas of non rhyming lines in my journal last night after looking out my window at the lightning bugs. But I did keep a pace to it or rhythm.  I always wish to paint a scene with Lightning Bugs but think it’d be rather hard, how would I do it? I guess when I look out at the Lightning Bugs I feel a sort of longing, just like looking at the moon when I’m alone. So the poem, as I developed it above, has a feel of longing for childhood, magical memories. It might have been different if I wasn’t looking at them alone. Also I introduced the names Flicker, Glimmer and Glow. As I wrote the poem I thought of them and how I could create characters of a more light and delightful kind to write a story about.

I’m sharing the poem because I’d really like some feedback. If you could read it aloud, especially to children, and see how it feels? Sounds? When I wrote it I meant for it to be read slowly, deliberately, quietly. This lends to a more somber mood though and I wonder would children find it peaceful? Would they prefer it read more lively? I’d love some feedback, please leave comments!

Rout Biscuits

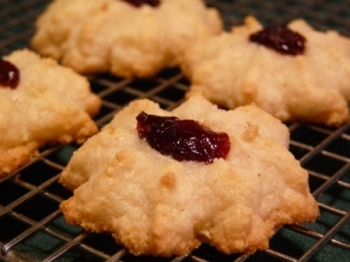
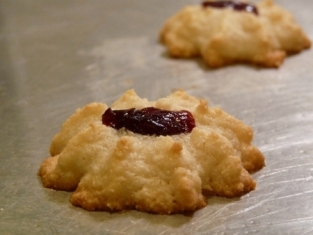
Rout Biscuits with dried cherry on top

A very yummy , sweet, crispy, light and chewy all at once cookie! Well in England it’s known as a biscuit but all I know is it’s very easy and very special, perfect for tea time. Made simply from almond meal, sugar, egg whites and almond essence.

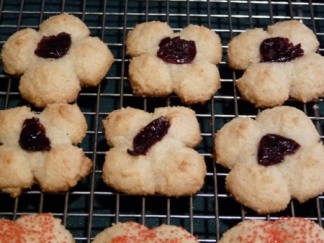
These clover shapes were made using a different plate.

I read that these were “popular accompaniments to a glass of wine or sherry at routs or fashionable gatherings in the 18th and 19th centuries.” It comes from Middlesex England. Your supposed to put a bit of glace cherry on top but I hate them, so I used dried cherries.

Crisp on the outside and chewy inside.

Now I didn’t know what a Rout was…did you? Well I looked it up and the only definitions I can find have to do with disorderly retreats (battle), a noisy rabble, to root or poke (like a pig!), a disorderly crowd of persons! Well I didn’t read anything about “fashionable gatherings”! Until I found an article on Huffinton Post that had a great article all about Nut Biscuits (cookies) from different countries. Reading about them gives me some ideas that might be creative to try out. (I’m sorry they took the link down so I removed it! Wish I had copied it)

I made some using a heart shaped plate.

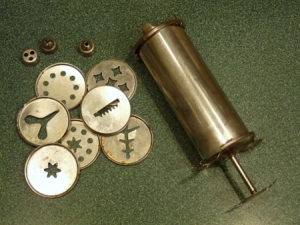
You can easily try different shapes by just changing the round plate on the end of the press, no need to empty the it first. I made these heart shapes, depending on how much dough you squeeze out will make them fat or thin.

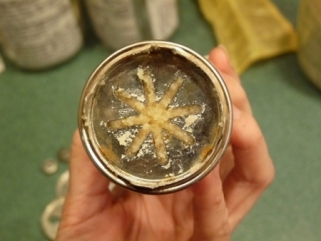
My old dough press, love it!

I bought this old press at the thrift store or a garage sale and I love it. It doesn’t have all the parts but I can still use many of the plates. Some are a bit spotty-old but that doesn’t hurt anything.

This is the press with the plate in it, and dough.

This is what the press looks like on the end the dough comes out, I have the ‘star’ plate in it.

Three plates and the cookies they make.

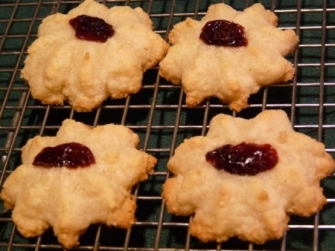
This shows the three plates and the cookies they make, a heart, star or blossom and what I’d call a clover. The blossom or star is great for putting a bit of jelly or fruit on top and I guess the clover is too.

Golden and hot from the oven!

Rout Biscuits

6 oz (3/4 c + 2 T + 1 tsp) castor sugar (or reg white sugar)
6 oz (1 3/4 c) ground almonds
2 egg whites (about 5 1/2 T)
1/8 tsp almond essence (extract)
A little beaten egg yolk to glaze (if you want, I didn’t bother)
small pieces of glace cherries (or dried cherries I used), angelica or flaked almond for decoration

1. Set oven to 350 F

2. Mix sugar and almonds, you can weigh them into the same bowl.

3. Beat the egg whites with a fork a bit to break them up. I made a small depression in the centre of the mix
and poured the egg whites in then added the almond essence to it and mixed it into the egg, before mixing
all up into the almond-sugar. If you’re using up egg whites from other recipes, just measure out the 5 1/2 T.

4. Mix it and cream it very well. Let it sit while you grease a cookie sheet and give it another mix when you’re
ready. Another recipe I found suggested letting it sit an hour, so go ahead and make these up and let them sit while you clean up the kitchen! Spoon into a pastry press or an icing bag with a star tip and pipe into stars or using the press try
different shapes. I liked the heart, 4 leaved clover and the big star; that one is nice for the cherry. You can add
a sprinkle of colored sugar if you like.  I didn’t glaze with egg but maybe I’ll try if I start with whole eggs next time.

5. Press or pipe directly onto greased sheets and press pieces of dried cherry or glace cherry into tops if you like. You can also sprinkle with colored sugar. Bake 8-10 min, until golden all around edges.

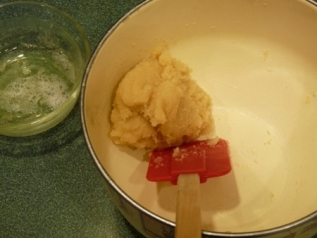
Some of the dough in the bowl.

Here’s some of the Rout Biscuit dough in the bowl, waiting for the press. A note from me, I have never had a ‘Rout Biscuit’ before so I wasn’t sure the consistency of the dough. I’m not sure if it should be stiffer, resulting in a less puffy biscuit? All I know is they tasted dandy!

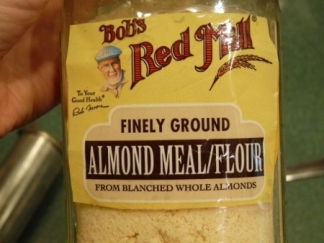
Bob’s Red Mill almond meal flour.

I bought this at my local ‘Tops’ grocery store in the organic section, but it was EXPENSIVE!  More than $10, yikes!

Lots of Rout Biscuits waiting to be sampled.

These biscuits (or cookies) keep well in a tightly sealed container. Have you ever made Rout Biscuits or eaten them? If so please leave me a comment about them.

Below are links to glossy cards I made with the recipes on, you can keep them or send them!

“Rout Biscuits” Glossy Post Card
“Rout Biscuits” Recipe Card with customizable text
It’d be fun to mail this to a friend who loves baking! Maybe a birthday or to drop a hint that you want cookies!

Mini Party Tarts

Mini Party Tarts with strawberry filling

This is an easy one! Just whip up some homemade pie crust dough first. I hate store bought dough, it has too many weird ingredients in it! Then open a can of pie filling…I know, I know that should be homemade too! But I didn’t have time and I have a couple cans kicking around that need using up. You can use jam too, I did for a bunch too.

Oh yummy, a sea of tarts waiting to be eaten!

You roll out your dough, cut circles, push them into mini muffin tins and fill (not too full!) and bake! Easy! See my directions below with the photos. At the end I included pictures of tarts ‘not so mini’ made with regular size muffin tins too.

Big muffin size tarts!! Oh wow, more yummyness!

The picture above shows larger tarts you can make using a regular muffin tin. This makes nice big tarts that when you put a swirl of whipped cream on top they look really marvelous. Um…yes, I ate one warm from the oven…then later had some vanilla ice cream with one! haha…gotta enjoy what you do!

Mini Party Tarts

Easy Flaky Pastry (my usual pie crust recipe, enough for two crusts)
2 1/4 c flour (I don’t pre-sift, just fluff it up before you measure)
1 t salt
3/4 c shortening
5 T cold water

Filling = one can pie filling or some jam.

1. Mix flour and salt in bowl with whisk.

2. Cut in shortening with hand pastry blender.

3. Sprinkle very cold water on top quickly. Toss lightly with a fork before you start to push it together. Or you can use a bowl scraper and toss it then start to push it together to form dough.

4. Roll it into a ball then on counter cut in half. Pat each out into a disc and wrap in plastic wrap and refrigerate.

5. When ready to use, roll out one half on floured counter, rolling a few strokes then take edge of dough and give it a twist to turn it…add flour to table and pull dough back onto it. Keep repeating and rolling always making sure you can move the dough on the table. You’ll know it’s about to stick when it doesn’t freely spread as you roll it. OR you can put some between two pieces of plastic wrap and roll it, I tried it when the scraps got smaller, it kept it from getting tough with too much flour.

6. Cut circles, mason jar lid was perfect size, and push into mini muffin pan cups. (ungreased) Pat sides to make even and it helps to use my wooden tart mold thingy to push bottom and sides to make it thinner and even.

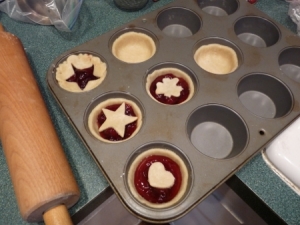
7. Put a bit of jelly or canned pie filling in each, fill NO MORE THAN HALF WAY! Maybe even less, it will bubble up and over if too full. I also noticed that if you cut a small decorative piece of pastry to put on top, it seems to make it bubble up over edges worse. Nothing on top and they didn’t boil over, look at the pictures and see what I mean.

8. Bake 425 for 10 or more minutes. Watch them, I forget if it’s more. They won’t really get golden, the filling would get too hot if they do. I could try baking them at 375 and see how it goes too?

A few pictures of my steps and finished tarts.

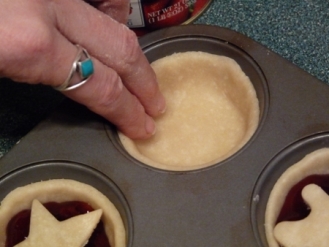
Lay dough on top then gently push it down into tin with finger tips.

Large muffin tin with some filled and dough waiting to be pushed in.

Use your fingers to press sides and bottom, watch out for tears with your fingernails!

You can use your fingers and if you have a wooden dough press thingy…(I need a picture of mine!)…then that works great at smooshing the dough up the sides and into bottom.

We're getting there!

Experimenting with tops…Don’t overfill them, they bubble up over the edges.

Muffin cup sized tarts...I want one now.

When they were done I sprinkled them with confectioners sugar and they looked a real treat! Sorry no pics of that. I can’t wait to try more varieties.

  • To take with you, just put cooled, sugar dusted tarts on a jelly roll pan or any pan with sides. If sides are low use a sheet of waxed paper on them then cling wrap. They keep really well in the fridge a few days too, just not as crispy.

Braided Whole Wheat Bread

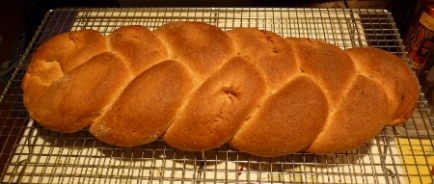
Braided Whole Wheat Bread

Lately I’ve been on a bread baking kick. I’m determined to keep trying recipes until I come up with a few that I feel are my ‘old standbys’. I don’t like reading ingredients on store bought bread like ‘mono + digi steroids of fatty acids’, or something like that! eww…shudder! Remember the more you bake the quicker you get at it.

I especially want to find that perfect whole wheat recipe that uses mostly whole wheat flour and not white, it’s hard to do. I’ve baked a few loaves already that though they tasted great, they didn’t rise up as nicely as I’d have liked. This one seems to be a good one! I’ll try it as a loaf next time.
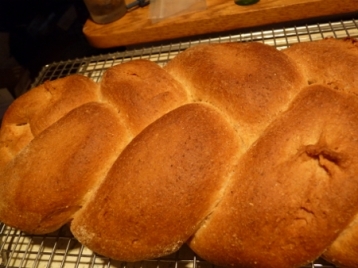
All golden brown and crispy!

This recipe is from Hodgson Mills but I changed the amount of wheat gluten and went more by what the ‘Vital Wheat Gluten’ box suggested.  I made half a recipe to test it, you’ll see I put the recipe here in half (one loaf like mine) and double. You don’t have to braid it but isn’t it COOL? Try it, impress your family!
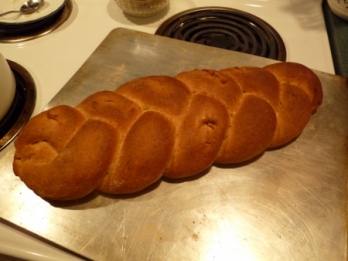
Hot from the oven on the cookie sheet

If you notice there’s a few spots that looked pinched, that’s where the towel stuck a bit after the second rise. I learned, don’t use a towel! Use plastic wrap sprayed with oil on second rise. Also it’s a bit darker than I’d like, I put it in for recommended time and had a workman here distracting me so it was a little darker than I’d like. But it is fine and very nice and crispy when you cut it…oh yummy!

I have given the ingredients and detailed instructions for making one loaf and how to braid it. Then following that I have the recipe for two loaves and I cut all the extra blab out, so if you’re used to baking you can just look at that. Here’s the recipe for you:

Whole Wheat Bread – from Hodgson Mill package

* My Notes: I altered the amount of vital wheat gluten the original recipe called for. Also I mixed this by hand.

ONE LOAF:

1 c warm water
2 1/4 tsp active dry yeast – MEASURE the YEAST! I found there wasn’t the right amount in one package, go by measuring it!  You may need two pkgs to get what you need.
1 1/2 T brown sugar
1 T + 1 tsp vital wheat gluten (you can buy this at the supermarket, it’s a powder that helps the loaf rise better)
1 1/2 c whole wheat graham flour (I used reg. whole wheat flour)
1/8 c vegetable oil (2 T)
1/2 tsp salt
1 1/2 – 1 3/4 c white Bread flour (mine took 1 1/4 c only)

1. Measure yeast into a large bowl, make sure bowl is not cold. Add the warm water and stir to get wet and dissolve. Let it develop 10 min. while you mix next step.

2. Mix in the bowl you’ll let the dough rise in (just so we don’t mess up too many bowls): brown sugar, wheat gluten and wheat flour. Make sure there are no little hard lumps of sugar, just mix it around with your fingers. If your flour is cold from being in the fridge or the house is cold, put this bowl of mixture right in a warmed oven to take the chill off. NOT a hot oven, turn it to warm, let it warm up then turn it off…put bowl in.
Add this mixture to the yeast mixture and beat for 200 strokes! Yes…200. Believe me it’s good exercise if your doing this by hand…but with all the goodies I like to bake I figured it’ll help me burn calories! haha

3. Add oil and salt and mix it in well.

4. Add 1 c white bread flour and beat well, work in enough of the remaining flour to make a soft dough, not sticky. Do all this in the bowl, you can use your bowl scraper and push flour into the dough, then use your hand, use a kneading motion to work flour in.

5. Turn onto floured counter and knead 6-8 minutes, or until smooth and elastic. Time to meditate. Take that bowl you used to mix flour in and wipe it out, oil it and put the dough in it. Roll the ball around to get it oily then use your hands to make sure it’s oiled. Leave in bowl, covered with a slightly damp tea towel and let it rise in a warm place. I like to warm the oven, turn it off and let it cool a bit then put it in. Close the door only if it seems cool enough, if still pretty warm don’t close it. Set your alarm for one hour and let rise (or until it doubles). Wash your dishes now and if your smart, get a family member who wants the honor of punching the dough down, to wash them for you!

6. Punch dough down. Plop out on counter and pat it out to push gas out of dough.
To make a braid:
a. I patted it into a circle like a pizza, then with a really large knife just cut into thirds like a peace sign.

b. Take each section and pat it out more into a long shape then roll it so it forms a thick rope. Pinch the seam and now roll it more on the counter, to make it stretch longer. Mine ended up about 18″ long. Do this with all three, it’s not hard, really! It’s like playing with play-dough!

c. Lay them side by side on the floured cookie sheet and at one end pinch together and sort of tuck it under so it looks nice.

d. Now braid it like hair…ahmm…I braid my hair every day but doing it on something else can be confusing (it did me!) so don’t give up. Just pick up one outside rope and cross it over the center one. Now pick up other outside rope and cross over the ‘new’ middle one. Keep repeating. If there’s a tiny bit of flour on them and your hands they won’t stick and you can keep rearranging them till you ‘get it’.

e. At the end just pinch together and tuck under. Now look how COOL that looks!!!
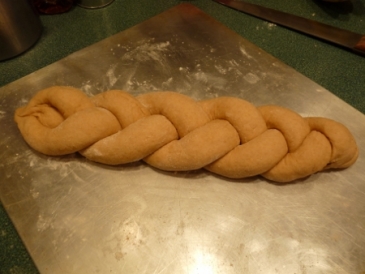
Braided and ready for the second rise!

If you’re putting it in a loaf tin just pat it out into a rectangle shape then roll up, pinch seam and ends to seal and put in greased loaf tin.

7. Cover with plastic wrap (towel can stick to dough now) that you spray with oil, just enough to keep it from sticking. Let it rise again (back in the oven) about 45 min or until nearly doubled. * If you like, when you make your roll, dampen with water then roll it in oats or seeds before putting in tin or on cookie sheet, they stick, look nice and the family will think you’ve turned pro!

8. Carefully take out of oven (if that’s where you let it rise!) and leave covered while you pre-heat your oven to 400 degrees F. Uncover dough and bake 30 min. (Directions say 35 and this was too much, so keep an eye on it at the end) Done when it’s golden brown and sounds hollow when tapped. Let cool on wire rack, don’t cool in the tin.

TWO LOAVES!

2 c warm water
5 tsp / or 1 T + 2 tsp. active dry yeast
3 T brown sugar
2 T + 2 tsp vital wheat gluten
3 c whole wheat graham flour (I used reg. whole wheat flour)
1/4 c vegtable oil
1 tsp salt
3 – 3 1/2 c white Bread flour

1. Measure the yeast into a large bowl. Add 2 c warm water and stir to get wet and dissolve. Let it develop 10 min. while you mix next step.

2. Mix in another bowl, brown sugar, wheat gluten and wheat flour. Add this mixture to the yeast mixture and beat for 200 strokes!

3. Add oil and salt and mix it in well.

4. Add 2 c white bread flour and beat well, work in enough of the remaining flour to make a soft dough, not sticky.

5. Turn onto floured counter and knead 6-8 minutes, or until smooth and elastic. Take bowl you used to mix flour in, wipe it out, oil it and put the dough in it. Roll the ball around to get it oily then use your hands to make sure it’s oiled. Leave in bowl, covered with a slightly damp tea towel and let it rise in a warm place.

6. Punch dough down and divide in half. Form each into a loaf or round by first pushing out on counter to push gas out of dough, then roll up. Put in greased loaf tin or for a round or shaped loaf put on cookie sheet dusted liberally with flour. Cover with plastic wrap that you spray with oil, just enough to keep it from sticking. Let it rise again (back in the oven) about 45 min or until nearly doubled. * If you like, dampen dough with water then roll it in oats or seeds before putting in tin or on cookie sheet.

7. Carefully take out of oven (if that’s where you let it rise!) and leave covered while you pre-heat your oven to 400 degrees F. Uncover dough and bake 30-35 min.  or until top is golden brown. Done when it comes out of tin easily and sounds hollow when tapped. Let cool on wire rack, don’t cool in the tin.

I hope you try it and let me know how it goes for you. I’m still learning how to bake good yeast bread and would love to compare notes.

Old Fashioned Apple Cake

This is what I believe is an old traditional recipe, I adapted it from a blog post here.

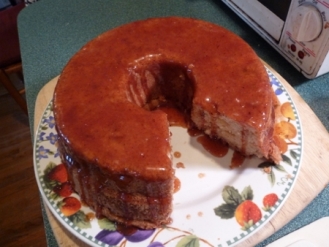
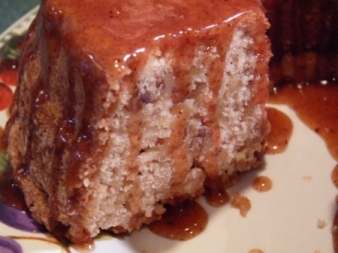
Old Fashioned Apple Cake with my Cinnamon Sauce

I dropped some of the oil and used applesauce, I also topped it with my own cinnamon sauce creation, SCRUMPTIOUS!

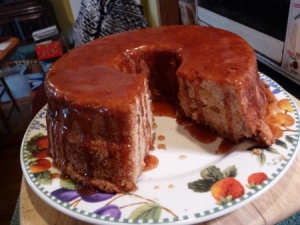
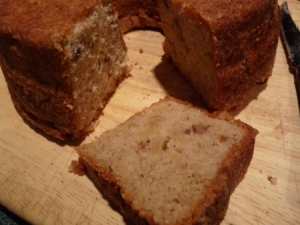
Still warm from the oven, I couldn't resist cutting it!

You don’t need any glaze really but you can make up a simple confectioners sugar, milk and vanilla glaze if you want.

Is that piece for me? I don't mind if I do!

It makes a nice big cake and is SUPER easy to make! A good one for beginner bakers.

A warm slice cut...filled with moist apples.

Old-Fashioned Apple Cake

3 apples peeled and chopped (2 ½ c or more, use tart apples)
2 1/2 cup sself rising flour (or plain flour plus 4 tsp of baking powder and 1 tsp salt)
2 cups sugar
1 tsp cinnamon
½ c oil (original recipe called for 1 c oil, I cut it and added the applesauce)
½ c applesauce
2 eggs
1/2 cup chopped nuts (optional)

I’ll add pictures here along with the directions:

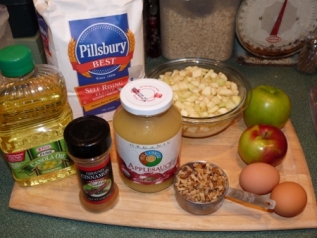
Simple Ingredients

Gather your ingredients together; this cake is made with just a few.

1. Peel and chop about 3 apples, 1 1/2 c or more, using tart apples. Set aside. Grease and flour your pan now too so it’s ready.

2. Mix s.r. flour, sugar, cinnamon in a bowl with a whisk. Add nuts and or raisins now if using.

3. Measure oil into large glass measuring cup then add spoonfuls of applesauce to make the level rise to 1 c. Now add two eggs and carefully mix eggs in well. (Saves getting more cups dirty!) Add to dry ingredients and mix.

Oil and applesauce in measuring glass.

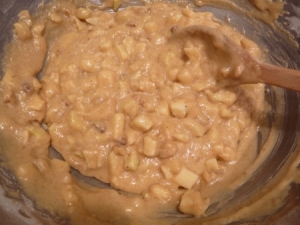
4. Add apples and finish mixing by hand; it’s a thick, heavy batter.

The Apple Cake batter is thick and heavy.

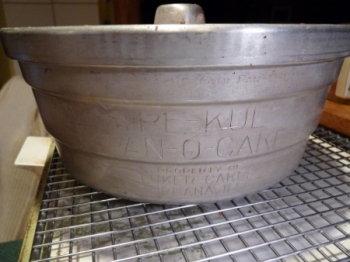
5. Spoon into well greased and floured bundt or angel food pan. I used an antique pan called “Re-Kul Pan O Cake”, I LOVE that, Pan O Cake! haha…More about that later.

My "Re-Kul Pan O Cake" pan.

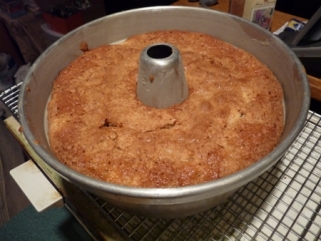
6. Bake at 350 F 45 min – 1 hour. It comes out with a nice sort of crust on top, I think because of the sugar in it.

Apple cake finished!

Let cool 10 minutes in pan then remove to rack to cool by turning upside down. Or after removing, put on plate and drizzle with glaze made from confectioners sugar, milk and vanilla. Original recipe said to put it on cooled cake, but I liked putting it on warm, made it all melty.

Here it is unmolded and warm.

My Notes:

  • The original recipe called for 1 c oil, I cut it to 1/2 c and added 1/2 applesauce; it was great.
  • Try cutting the sugar back too if you like, I’ll try it next time and let you know how it goes.
  • Raisins are really nice in this!
  • Make sure ingredients are at room temperature, it helps.
  • I bet this would be really good baked in loaf pans too because the top came out with a lovely sort of crispiness.
  • I also baked this as a half recipe in a 9×9″ pan, plenty for one or two!
  • Gosh don’t you just love an easy recipe that comes out so great?!

So you’re wondering about that pan? Well I bought mine at a thrift store, must be ages ago, and never used it. When I was cleaning out my lower cupboards I pulled it out and thought it was interesting with the writing engraved on the sides. I guess a baker named Jackson M. Luker in Urbana, Illinois, was in competition with another bakery across the street. They started selling angel food cakes cheaper, this made him so mad he left ALL his cakes to sit and spoil. When they sat in the pan so long he thought they were ruined but actually, because of being made with egg whites they formed a sort of hard crust and it kept them quite fresh inside. He had the brilliant idea to offer them this way in the pan and was able to ship them all over the USA. You send the pan back in for a refill cheaper! You could buy one for $2.50 then the refill was $1.25.

Read the article here to learn more about this inventive baker: http://www.gourmet.com/magazine/1940s/1947/08/foodflashes . I saw a pan like mine for sale on EBay for $69!! No Way! Then I saw one on a site called “Proxibid” and it sold for $1, so hey, maybe you can find one?

Irish Soda Bread – my St. Patrick’s Day bread

Irish Soda Bread

This is the recipe I always used for St. Patrick’s Day. Usually I make one big round loaf using my largest pyrex bowl from the set of three.

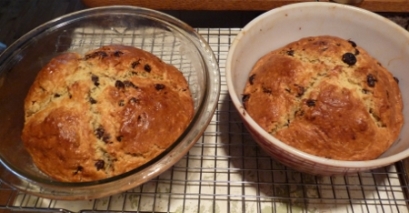
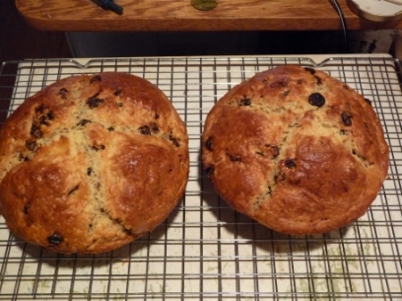
I made two loaves with the full recipe.

This time though I decided to make two smaller loaves so I could share one with my friend Ann Marie, shh, it’s a surprise!

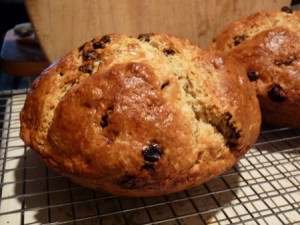
The two loaves cooling, gosh the house smelled wonderful!

After 10 minutes cooling, you can take the bread out of the bowls to finish.

Oh deliciousness!

If you can resist, it tastes best the day after you make it. Let it cool totally, wrap up tightly the RESIST! Well I usually can’t do that…resist that is, so I have a nice slice after dinner with coffee. Well you do have to test it to make sure it’s good enough for everyone right?

Irish Soda Bread – Makes one big loaf or two smaller ones.  Directions also follow for mixing it up for jar mixes.
Preheat oven 375 F and grease your bowl(s).
4 c flour
1/4 c sugar
1 tsp salt
1 tsp baking powder
1 tsp baking soda
1 T caraway seeds
1/4 c butter, (1/2 stick) softened
1 c raisins
1 1/3 c buttermilk (or 1 1/3 c milk with 1 T + 1 tsp of vinegar or lemon juice added to the measuring glass first. )
1 egg

1. Put your sifter into or over a bowl then put in it- flour, sugar, salt and baking powder, baking soda, then sift into bowl.

2. Cut in butter with pastry blender until like course crumbs, rub in with fingers if you need to also.

3. Mix in caraway seeds and raisins.

4. Combine the milk, egg and baking soda and mix well. I measure the milk into a large liquid measuring cup then add the other things to it.

5. Stir into the flour mixture, mix with fork first then use bowl scraper or big rubber spatula.

6. Turn dough onto floured surface, I do it right on my counter top. Knead lightly until smooth, really hardly at all, just to form a ball shape, dough will be soft.  Shape into a ball then spray a pyrex bowl (the large one of a set of three) with spray vegetable oil. OR divide dough in two and put each in medium sized bowl.

7. Put dough in and cut a deep cross or X into it with a knife, (to release the fairies!) gently push it apart so it’s slightly open. Take one egg yolk and brush (or use fingers) on top and into cracks.

8. Bake one hour, (for two smaller loaves bake 50 minutes) cool in bowl 10 min. then remove to finish cooling.

This tastes best the next day, if you can resist! Wrap well and store in ziplock bag as you use it up.

Irish Soda Bread Recipe Post Card postcard
Click the picture above to see a glossy recipe post card you can order for your self or send to a friend. (Or put your own favorite recipe and photo on it using my template!)

Full sized loaf of whole wheat soda bread I made another time using this recipe.

** Another version: 1/2 golden raisins, 1/2 regular raisins,  no caraway seeds, 1 1/2 c white whole wheat flour, 2 c regular flour, 1/2 c oatmeal.

** Another version I tried: leave out the raisins and seeds, cut sugar to 1/8 c, use 2 c whole wheat flour, 2 c white whole wheat flour, add a bit more of the baking soda, I added a LOT of Italian seasoning and parsley, some basil this was good, but I also added dried cut up tomato and this was ok, wouldn’t add next time, but mine were quite dry.

** The original recipe has you add the baking soda with the milk and egg, then add it all at once to the dry mixture. I found no difference really by adding it with the dry ingredients, the mix the egg and milk and add. Just have your oven ready because with soda breads and scones you want to get them into the oven right away.

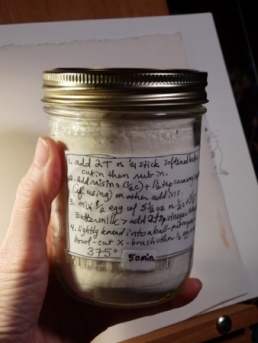
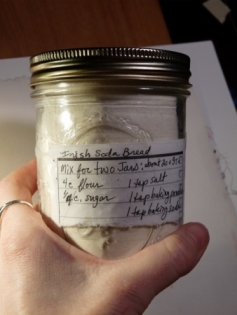
** For putting into jars to mix small loaf when you want it. I love doing this with recipes because I’m only baking for one or two and this way I can make smaller amounts and have it ready quicker!

1. Mix in a big bowl:
4 c flour
1/4 c sugar
1 tsp salt
1 tsp baking powder
1 tsp baking soda

Write out instructions on a small paper, tape to the jar.

2. Divide between two (2 c) mason jars, about 2 c + 3-4T each or divide putting some in a jar and some into a bowl to make into bread right away.
3. Put these instructions on the jar (cover the paper with wide clear tape totally and it will last longer): To make put contents into bowl.
4. Cut in 2 T (1/4 stick) softened butter, then rub in till like crumbs.
5. Add 1/2 c raisins + 1 1/2 tsp caraway seeds (if adding these things)
6. Mix 1/2 an egg with 5 1/2 oz OR 1/2c + 3 1/2 T of Buttermilk (or add 2 tsp. vinegar or lemon juice to milk) Mix in with flour with fork then use bowl scraper to get into a dough. Put on floured cupboard and lightly knead into a ball. Put in greased Med. Bowl cut X in top and brush with remaining egg. Bake 375 for 50 min.

I also add the dry ingredients list to make new batches on the back side.

I also put the dry ingredients list on the jar so I can easily make new batches and refill. Try all kinds of variations with your soda bread. Decrease sugar if making a savoury bread for dinner.

Enjoy baking and let me know if you try this bread!

Don’t forget to check out my shop on Zazzle, lots of spring cards and gifts and glossy recipe cards you can send. GO HERE

Blueberry-Raspberry Muffins

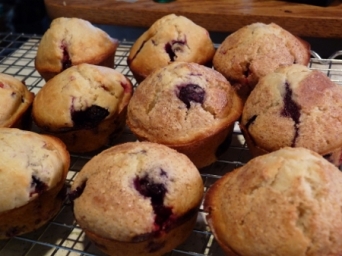
Fruit filled muffins! This is using the basic muffin recipe from my mom’s (Grandma McAndrew) old black book.

A dozen fruit filled muffins...not for long!

This is an old black binder that she put together when first married, my sister said some of the recipes were written in her mother’s hand (my Grandma Judge). I just love that and am so happy that I inherited it. Many of the recipes I share here are old favorites of our family and I hope my own boys or nieces and nephews will find the instructions and recipes here helpful. My mom and grandma would like knowing there recipes were being passed down as it were.

ahmm...need I say more? Let me at it!

This recipe is an old favorite but I added the fruit, which was great!

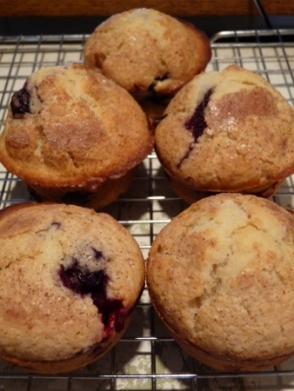
Cooling cinnamon + sugar topped muffins

You can sprinkle the tops with cinnamon and sugar.

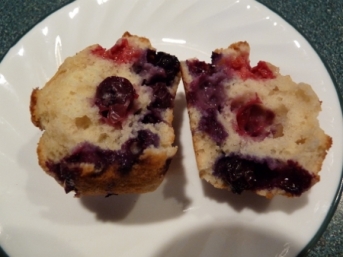
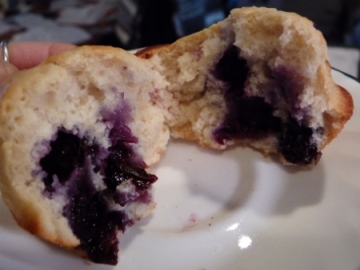
Split fruit filled muffin, waiting to be eaten.

Mom’s Plain Muffins                     400 F    20-25 minutes

2c Flour
1/2 c sugar
3 tsp baking powder
3/4 tsp salt
1/3 c shortening
1 large egg
1c milk
1 tsp vanilla extract
1 1/2 c frozen or fresh blueberries, raspberries

1. Sift dry ingredients into a bowl then give it a good mix with a whisk to make sure it’s blended. You can store it in a jar at this point for when you need it.

2. Cut the shortening into the dry ingredients using a pastry blender, till it’s all crumbly looking.

3. Measure out 1 c milk and  into a glass measuring cup, then add egg and vanilla and mix well. (TIP: I take a wire whisk and stand it up in the glass; by holding the handle between your hands (like your praying) rub your hands back and forth and the whisk will twirl without splashing, like a mini mixer!)

4. Add wet to dry and mix only a little, DON’T mix lumps out, you want it lumpyish. Now fold in the fruit gently. If your fruit has icy frost chunks on them put in a small bowl and run some water on them and drain quickly, repeat until the ice is gone. Now pat them relatively dry before adding to batter. (I had to do this, I guess I have neglected my frozen fruit stash! But they all tasted just fine.)

5. Have oven pre-heated and spray or grease a 12 muffin pan. Fill cups dividing batter up between them. If you want add a sprinkle of cinnamon and sugar to the top before baking, I did on half to see if I liked it; I liked both ways. Bake 20-25 minutes, mine took 23. When done and after cooling a bit, take a knife and gently go around each muffin while they’re warm. Then gently turn each one a bit in the pan to make sure they’re loose. Remove from pan while a bit warm to finish cooling on a rack.

Here’s some pictures of the muffins being prepared for baking and after.

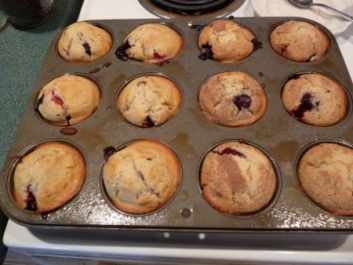
Batter in the cups and ready for baking.

The batter fills the cups right up when there’s fruit in it. The ones on the right have the cinnamon and sugar on top.

Blueberry - Raspberry muffins hot from the oven!

Oh the house smelled wonderful when these came out!

Blueberry - Raspberry Muffins without cinnamon and sugar.

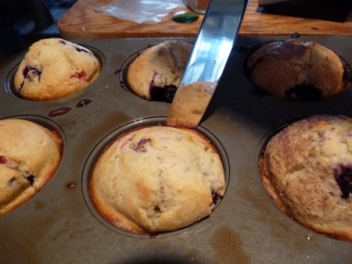
Loosen muffins with a knife while they are warm.

Take a knife and gently go around each muffin while they’re warm. Then gently turn each one a bit in the pan to make sure they’re loose. Remove from pan while a bit warm to finish cooling on a rack.

Here’s some old notes I had on the recipe:

Take peeled, chopped apple and put some batter in a cup, then liberal amount of apple topped with more batter. Put liberal sprinkling of cinnamon on top and sugar on top. YUM.

Try other add in ideas:
raspberry or strawberry jelly -1 tsp on top before baking.
maybe coconut (try combining with raspberry jelly?)
1 1/2 c frozen or fresh blueberries, raspberries
1 T cinnamon + 1/2 tsp nutmeg
1 c (or more?) chopped apples and more sugar
1 c shredded cheese
1 T savory spices or herbs of your choice.